Deploy your own vector tile server while getting your kids ready for school
David Heyman · June 26, 2018
TL;DR Go here if you want the instructions without the extended bit about parenting.
Has this ever happened to you?
I need to get some shapefiles online as vector tiles, but it's my turn to get the kids ready for school.
Fear not! I'm here to tell you it's now easier than ever to get your data online and ready to go without neglecting your parental responsibilities. I should know. It happened to me.
Prerequisites: Software and Morning TV
You should already have homebrew and NodeJS installed on your computer and the kids should already be awake and downstairs. Get them a drink and put on a 15-minute TV show (Go Jetters if you're trying to indoctrinate them as geographers) while you install 2 more bits of software:
Mapshaper
You probably know about Mapshaper for generalizing vector data, but it also provides some excellent GIS functionality on the command line. To install it, run:
npm install -g mapshaper
Tippecanoe
Tippecanoe from Mapbox is an exceptionally powerful piece of software for creating vector tiles. We're just going to scratch the surface of it with example, and installing it is as easy as:
brew install tippecanoe
Now that the software is installed, go make yourself a drink and watch the end of Go Jetters with your kids. Try as hard as you'd like, that disco theme tune is not going to be leaving your head any time soon.
Data Prep: File Conversions and Breakfast
To get your shapefiles into a vector tile format, there are 2 conversions we need to run. You data should already be well-organized with meaningful web-safe names in a dedicated project directory because you're a responsible adult. How could you look after children if you can't even look after your data?
Speaking of looking after children, they're starting to get a little grumpy. Better start breakfast and convert those shapefiles into GeoJSON.
Converting Shapefiles to GeoJSON
Point your terminal to the directory that contains your shapefiles. To keep things organized (thereby proving you're worthy of your kids' love), create a directory just for the GeoJSON files next to your shapefiles directory by running:
mkdir ../geojson
Now, you can convert all your shapefiles to GeoJSON with a single command that loops through your directory and takes all the files with a shp extension and converts them into GeoJSON using the same filename as the shapefile:
for f in *.shp;
do    mapshaper $f -o format=geojson ../geojson/`basename $f .shp`.json;
   done
While that runs, put some toast in the toaster or some Wheetabix in a bowl. You know what? You've got a little time. Set the table for your kids. Wash them some fruit and put that on the table too. Pour some drinks then call them into the kitchen for breakfast.
Converting the GeoJSON to MBTiles
You have 30 seconds between when the kids sit down for breakfast and when they start bugging you for something else. Quick! Start Tippecanoe running with:
cd ../
tippecanoe -o vector.mbtiles -zg --drop-densest-as-needed geojson/*
That script will add each file in the geojson directory to a vector tileset in vector.mbtiles. It could take a good 15 minutes to run. Go get your kids whatever stupid thing they're wanting and sit down for some breakfast yourself. Running a few terminal commands is hungry work.
Depending on the size of your dataset, you're probably going to want to revisit tippecanoe and generating your vector tiles. There are lots of different options for optimizing the size of your tiles at lower zoom levels. Come back to this step when you're done and iterate on it once you can see your data.
Provisioning a Server While Getting Everyone Dressed
Now the pressure is on, but there's only 3 steps to go. Run upstairs to lay out some clothes for your kids. While you're up there, quickly provision a server on Digital Ocean. You'll want the One-Click Docker App but the smallest size should do. While that's provisioning, get the kids upstairs and get their teeth brushed. Pro-tip: Brush their teeth before they're dressed.
Point them towards their clothes. While they struggle to get them on, go back to your machine and look for the IP address of your newly provisioned server. Just click COPY and it's on your clipboard, ready to go:

Copy the address and paste it into the SFTP client of your choice. Log in as root using either your SSH key or a password and upload your mbtiles file to your home directory. If you really want to get fancy, you can do the upload straight from your terminal with:
scp vector.mbtiles root@<server ip address>:/root/vector.mbtiles
While you're waiting for that to finish, go check on the kids and make sure they're presentable.
Starting the Server On Your Way Out the Door
It's the final step. The kids are dressed and their bags are packed. All you need to do is start your server and your status as a legend is secure. SSH into your server (ssh root@<server ip address>) and run this single command:
docker run --rm -it -v $(pwd):/data -p 80:80 klokantech/tileserver-gl vector.mbtiles --verbose
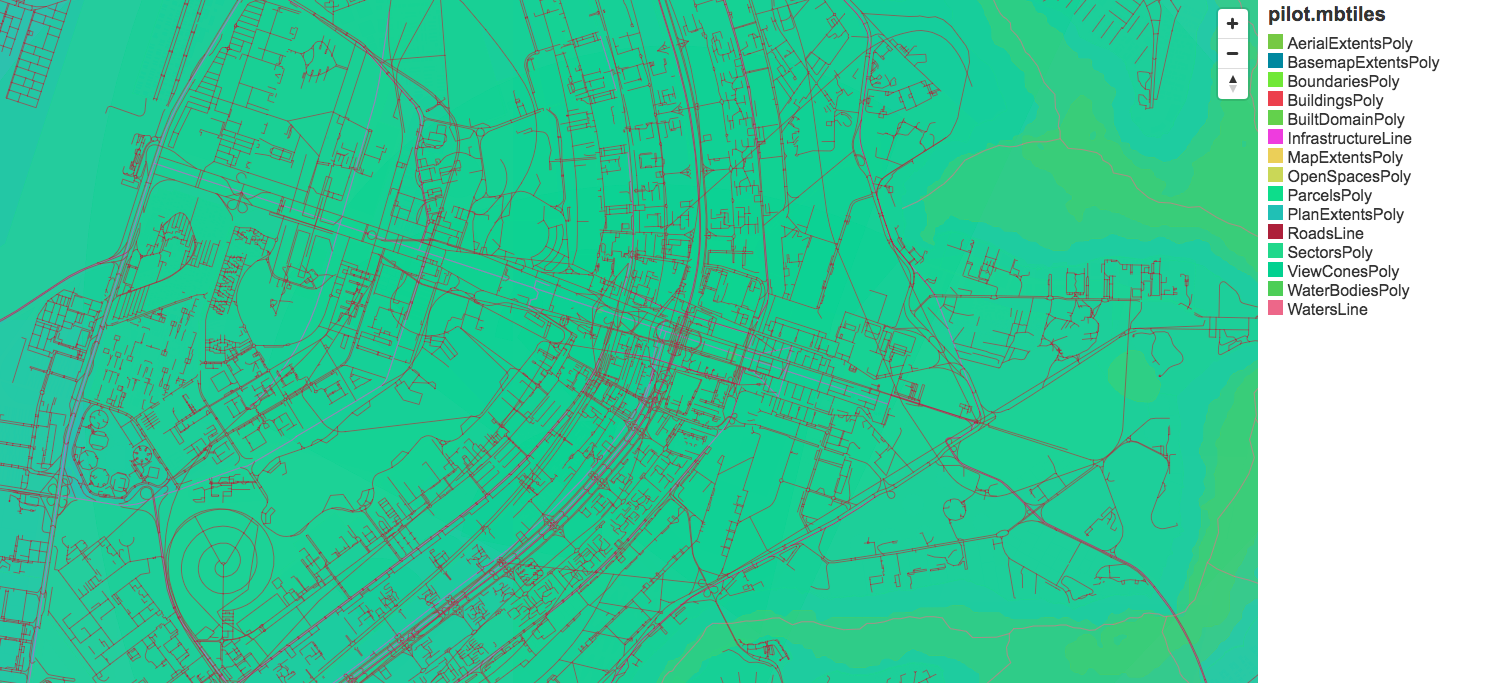
That's it! Go walk the kids to school. Get a coffee on your way home. When you're back, just visit the IP address in a browser and click inspect to view your tiles or grab the tilejson URL and start styling in OpenMapTiles!